Saturday, January 06, 2007

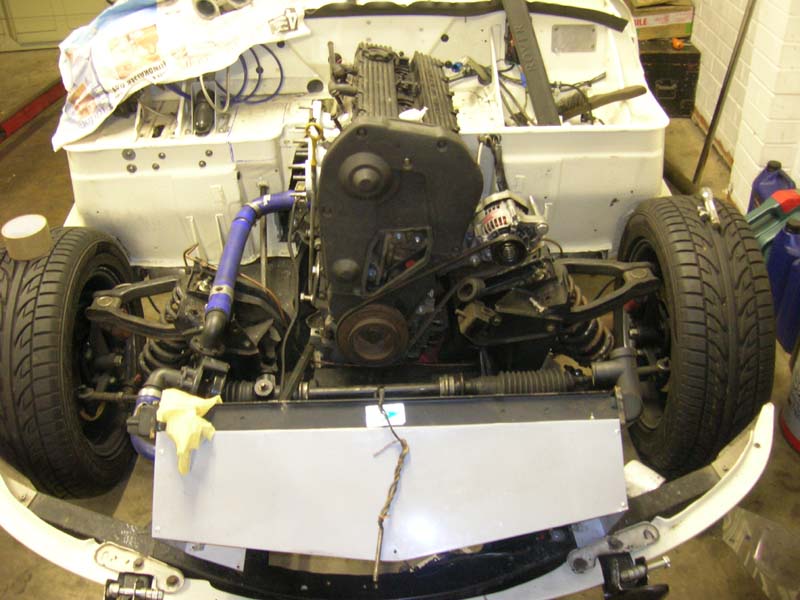
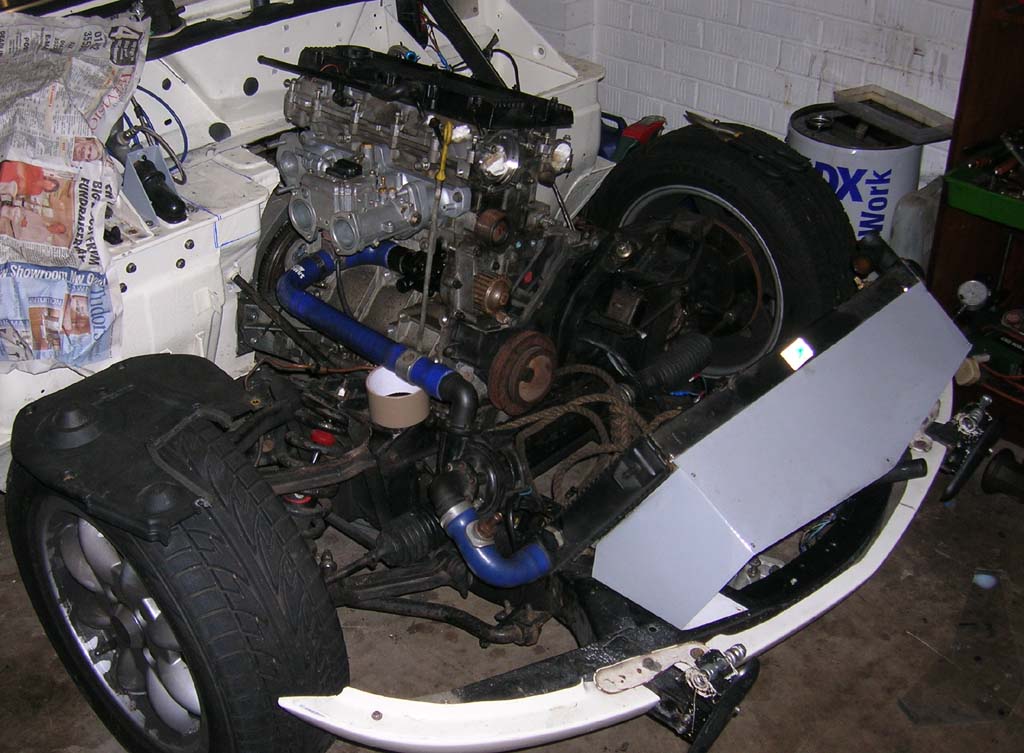
Mounting but not humping the engine.

Did a bit today.

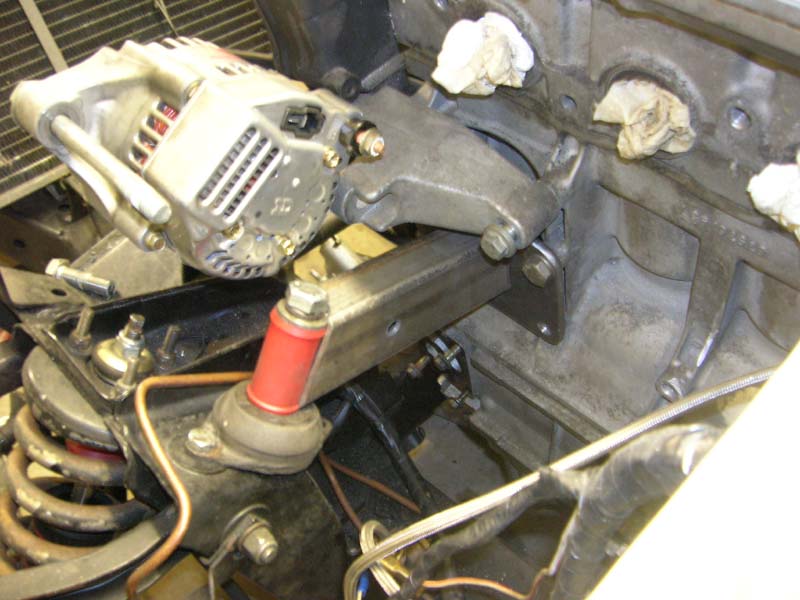
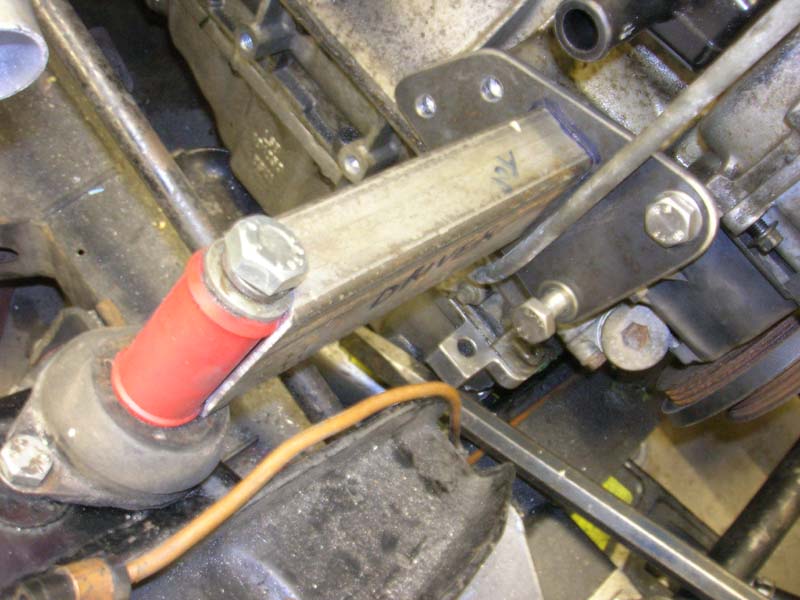
Made some bridges for my mounts.

The polybush is just a dummy, its exactly the same O/D as the steel tube I will replace it with once I get down the engineering shop.....This is pretty much exactly what Caterham use.

The tube I will make for the ends where the polybush can be seen will have a just over 1/2inch hole through them for the 1/2" bolt. I will find and weld on two big flat washers on the bottom where the tubes sit on the engine mount, to spread load a bit eh?

I need to use the lathe to finish off the mounts.

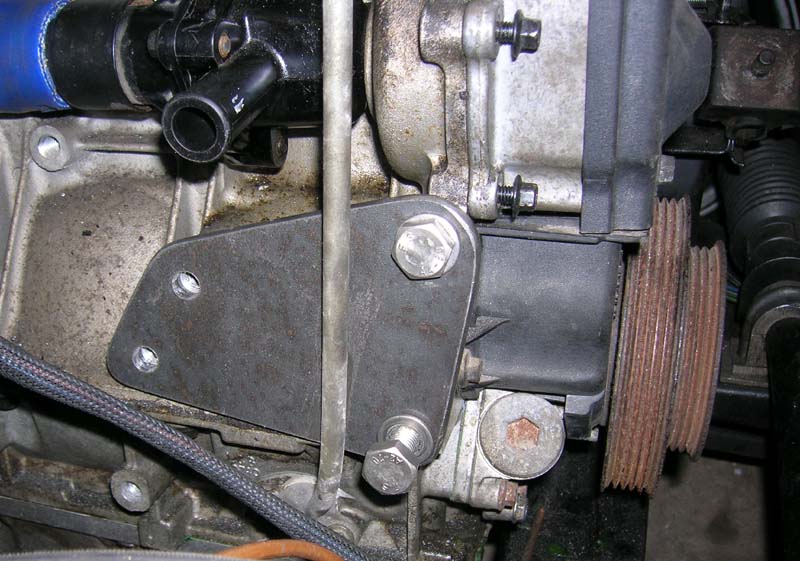
The E-Type engine mounts need a small box section making up and welding on to extend the plane the mount is sat on, backwards, will also house a captive nut/bolt for the mount... this is so there is something flat for the entire thing to mount on!


I could have made a 100 different styles of mount this just ended up as is cause its made use of what I had!

Its a bit over-engineered maybe :)

Have to heatshield the alternator its gonna get smoked by the exhaust Not sure it'll end up sitting so low...Could rehouse it on the otherside if needed...


So to move on I need to buy some new mounts as they are not 100% in shape having had a 300kilo e-type engine on them! also make the flat sections they sit on, once thats done I can get them both in place and welded.

Then onto the rear gearbox mount, I'd like this to be removable rather than welded in...So will probably cut 2 recentangles of steel about 8mm thick, 4inches long by 12mm wide, cut two threads into each, at the ends ..weld them to the top of the chassis rails and run a "u" style mount that slips down between the rails and bolts in at the top...

Also cut off the straight outlet pipe from the water outlet manifold that goes on the back of the head...refaced the remaining flange ready to accept some alloy pipe sections I will make up. These will run from this outlet over the exhaust manifold, forwards to meet some flexible hose by the timing belt cover. This manifold and pipe will be one section and mount to the engine. You can buy a similar item from caterham as with the engine in RWD form the outlets are all wrong. Space is a bit lacking so custom item needed.

I can weld on a suitable alloy nut to this pipe so I can fit a temp gauge...

Once the engine is mounted at the front I can undo the 210NM front pulley nut and get the pulley on the lathe...I couldnt touch it with the engine loose on the floor! Too light even with me standing on it.

Did I mention a bare K is under 90kilos :)

Friday, January 05, 2007

Doesn't making titles get tiring?

Isn't working with steel fun, not!

Took me most of the afternoon to make two plates for the engine.

Hardwork! Arms like popeye.


Need to make the bridges to the suspension turret next.

Steels a bit heavy but its reliable!

Also had another look at the alternator, it will go on using the other boss/mount point on its body. It actually lines up perfectly with the bottom pulley, leaving 2-3mm between the belt and the cambelt cover. As the pulley has 5 small grooves for a flat belt I will need to machine it for a single groove belt.

The groove will go as far forward on the pulley as possible and cannot go too deep into the pulley as I need to have material left to bolt on the trigger wheel for the ignition system.

This other mount on the alternator isn't as strong as the proper one but I think it'll be ok. I can make a stronger 3 dimensional top mount/adjustment system that is rigid, probably some alloy thing, that should make the loads on the alternator even out. You'll see.


Best pickup the pace a bit soon!

I think it'll look a nice neat install. Exhaust is going to keep passengers feet nice and warm :)

Ordered a tube of "adheseal", that might assist in starting on the fixed part of the gearbox tunnel. Yes it'll be mainly bonded in, made from alloy. Good stuff for panelwork this adheseal sticks with such grab and its flexible, only downside it takes 24hrs to go off. I will make the rear part of the tunnel removable as per normal, but maybe 50% will be attached to the body.


Thursday, December 28, 2006

Arranging things.

Finally a warm day! 9C, like summer compared to the last week!

Found a dipstick and tube at the scrappies, was missing off the motor. Needed that to check location for the engine mounting.

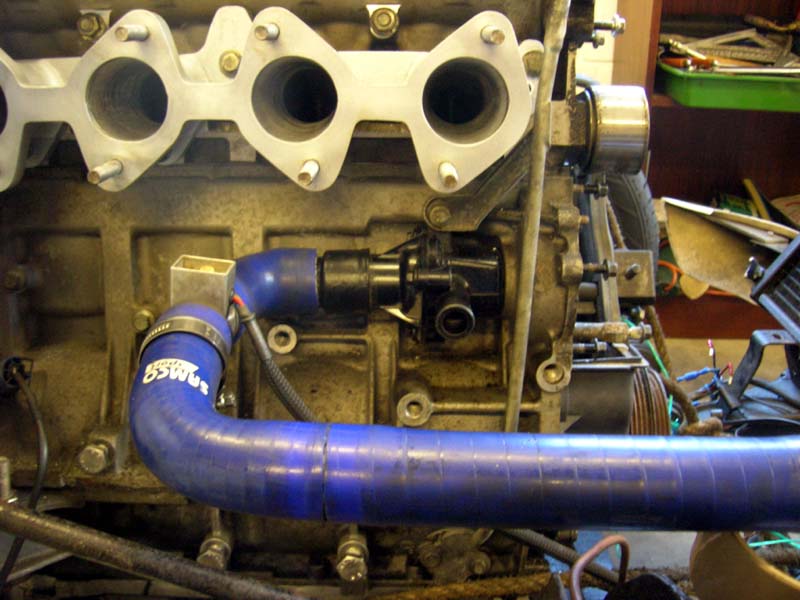
Did start having a fiddle with oneside of the water system, the side that enters the motor.

I think I will stay with this layout, the only thing I will change is to make the main length of blue pipe over the suspension turret from alloy...

I can then get a bracket or two welded onto this alloy pipe piece. I can then bolt the pipe to the turret this saves making any form of mounting for the EWP (water pump), it can happily hang...Simple is best!

Cunningly, I should then not have to buy any more hose by making the main outlet side to the rad from alloy also, being as this will be right over the exhaust manifold rubber etc isn't really suited.

As usual I modified some pieces.

The water rail can be seen in earlier pictures, this runs round the back of the engine along the block under the carbs to the thermostat housing...I simply hacked this off main water pipe at the thermostat end leaving enough for a flare and to get a clip on...

The thermostat housing is plastic and kind of pushes into the block. A future mod could be to punch out the entire thermostat housing and weld in an alloy tube to get rid of the plastic and remaining thermostat housing.

I removed the thermostat mech from the thermostat itself, leaving a simple disc with a hole as with the EWP and controller, no need for a thermostat so now there is one K Series problem gone, the dodgy thermostat system.

The black thing is the thermostat...Freelanders now have a remote thermostat kit available and caterham have used one for a while? Not on my list anyway.

The remains of the thermostat thing its simply there to make life easier now! The other pipe hole will be bunged up.

Thats the basic idea, EWP sits in the lower half of the radiator, so easily primed for bleeding. All the hose is from the last engine, cost £0.

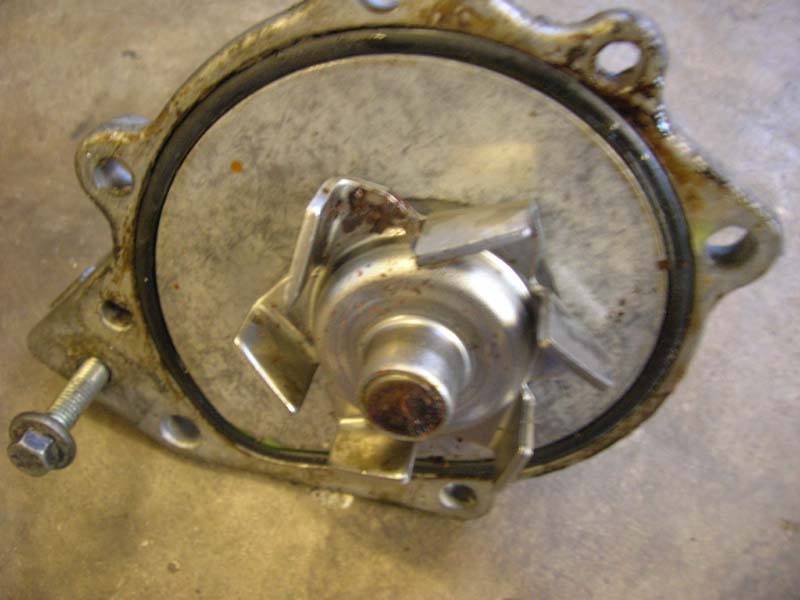
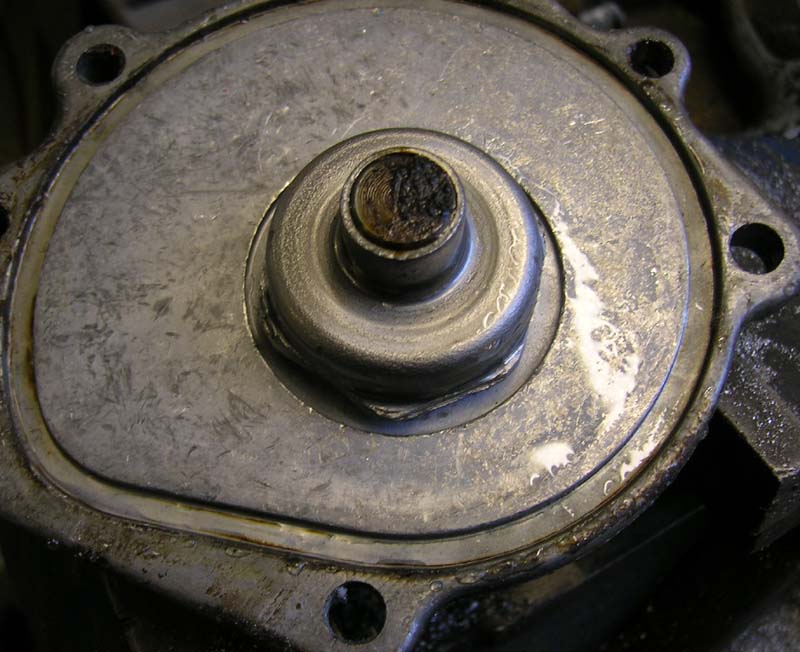
Water pump doesnt need a power sapping impeller blade lark, so I cut these off.
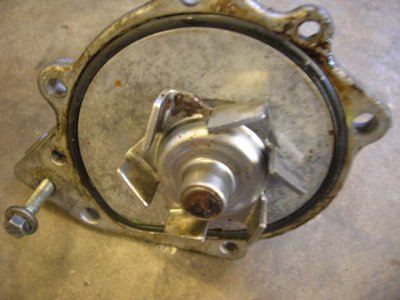
Wasn't sure whether to pull it all off by cutting the shrunk on flange and popping it off, maybe its the only thing holding the unit together? decided to just hack off the impellers instead, quick saw and wiggle snapped them off, quick file and jobs a gooden...Sadly you need the water pump drive cog for the timing belt eh, so can't just plate the whole thing and junk it.
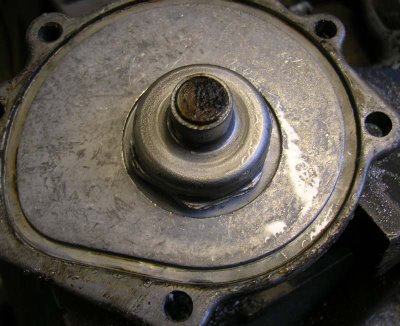

Impellers be gone!

Spacer for the clutch 25mm.
The other side of the water system wont be so easy as the clearance is quite tight and I can't get to it yet, until I make some front engine mounts and hack the bulkhead down more, bulkhead is currently shaved and cut just enough to hold the engine at the right angle to make front mounts.

I also need an Elise or MGF alternator as the lugs dont line up on my micro Kubota Denso one and would need more time and hassle than its worth to fit it. Also I need the alternator before I make the passenger side engine mount as clearance looks tight, also belt to check a few other things. It'll all come together quick at some point!

Only real pain in the wallet is getting this VVC head cam'ed up properly...and the exhaust.

If things come together well I will get the thing off for an exhaust fitting ASAP.

Still want a side exit exhaust, means I lower it more (at the front):)

Oil system needs looking at, need a block of billet to make a remote take off and take into account future intension to fit both oil cooler and apollo tank...

I intend to make use of the old engine mount points to add a strut brace type thing this can double as mounting place for this apollo tank and the oil catch tank/crankcase breather? Not alot of room elsewhere!


Manifold fits! Carb clearance by the clutch master cylinder is a bit close but should be ok!

So the project now owes me?

£280 previous count - engine, bellhousing, flywheel mods, clutch...undeniable bargain!

£2.50 for a dipstick

£10 for some steel.

£78 for an inlet manifold

£160 clutch slave cylinder -spacer etc.

£5 on grinder discs and hacksaw blades.

Some costs I will soon encounter below:

Will need a starter motor, the Ford ones bake with manifold heat and heavy, no good, the original Caterham Magnetron ones are unreliable and don't like heat, click click click is a well known noise to a Caterham owner with a 4 branch manifold.. Bosch ones are really big and cost a fortune - but luckily Caterham sell a "Brize" starter motor for £126, which is actually a bargain as Brize want £189 for what seems the same thing. To fit most of the starters listed i'll need an adaptor plate anyway, for £35, bar the Brize which has one built on...So its cost is better and its best starter!

£126 starter motor

£30 Pair of Jaguar E-Type 4.2 6 cyl engine mounts ~(Caterham use these)...

£10 on some alloy tubes for watersystem.

£20 to make rear water manifold

£30 to make an oil take off ready for plumbing fittings.

£25 remote oil filter mount

£40 for some oil lines from take off to filter point.

£40 shorten and balance prop.

£20 ignition trigger wheel custom size.

So hopefully have a mounted, plumbed engine for £1000 ish

Leaving two painful expenses but not a fat lot of work left.

Wednesday, December 20, 2006

Clutch system


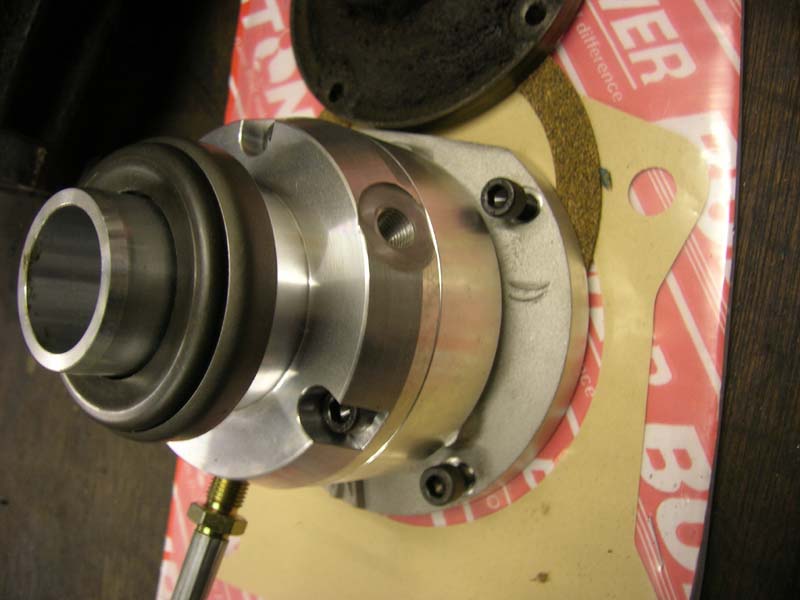
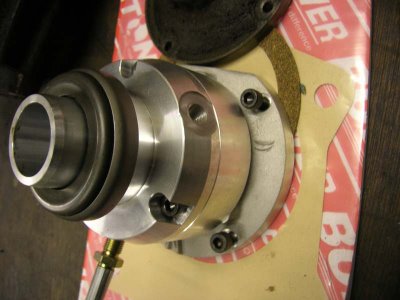
Picked up a concentric 1 piece clutch slave cylinder.

It needs a 1inch spacer to bring the unit out to meet the clutch. You can buy these. That leaves 3-4mm before its fully home, so leaving 18-19mm of clutch action to operate the clutch, the unit has 22mm of safe operation.

I will probably need to add a bumpstop on the clutch pedal, adjustable so it doesn't overwork the clutch pressure plate fingers.

I will add a blanking/inspection plate over the release arm hole in the bellhousing with just a hole for the hydraulic line. I will drill a hole through the bellhousing at the top. The line you can see attached to the unit is a 1500 spitfire rear brake line, I will modify this to become a remote bleed point, it will poke out the gearbox tunnel and allow easy bleeding. I can use the clutch line I already have to feed the unit and the original master cylinder...

Hopefully the unit gives a natural decent clutch action. I'll have test run next time the engines out.

No waggly rattly arms and wobbly bearings.....Not that cheap but its a nice neat solution.

Off to get some steel for the front engine mountings tomorrow, will get these made up and ready for welding over Christmas. I have designed them, just need to make them! They will use Jaguar E-type mounts.

Something is brewing.

Tuesday, December 12, 2006

About time....

Still not much to report :)No reason for that, just not in the mood for doing anything atm.

I intend to make some rapid progress in the new year.

Got a manifold for some carbs, hopefully it will fit, being a VVC an all.

Usually they are £150+VAT. Ebay turned up trumps for £72. Never one to pay full price for anything unless it cant be avoided!

Hopefully the inclination will be ok too...I assume the angle I have it at is stock fitment angle, otherwise I'll need to get it on a lathe mill and adjust the angle of the face that the carbs sit on...I would then need to tweak the studs, or bend them to suit the modified angle...

We'll see.

I best order a central actuated clutch thing soon and suppose i'll be needing a decent starter motor. Will flog the horrible ford thing that came with the engine.